How to set up, and configure, Lights-Out Management (LOM) on an Apple Xserve to work with modern versions of macOS
Table of Contents:
- Background
- Getting Started
- Installing Lion
- Install Server Admin Tools
- Lights-Out Management Configuration
- LOM in modern macOS
- Wrap-up
- Updates
Background
The Xserve is an enterprise 1U rack-mounted server that Apple made from 2002-2009. With the End-Of-Life (EOL) of the Xserve, the support for configuring and managing the Lights-Out Management (LOM) port went the way of the dinosaurs, and it is no longer possible to set up and configure the LOM port on any modern version of macOS. If you don't care about running new versions of macOS, this isn't an issue. However, with tools like OpenCore Legacy Patcher, the Xserve 2,1 (Early 2008) and Xserve 3,1 (Early 2009) are able to run the latest version of macOS. If you have a 2,1 or 3,1 Xserve, and want to run the latest version of macOS but also want LOM, you're out of luck. Until today. In this guide, I'll walk you through how I managed to get full LOM support on my 2,1 Xserve while also running the latest version of macOS.
Getting started
Before you get started, you need a couple things:
- 2,1 or 3,1 Xserve
- 2 Ethernet cables
- Switch or router connected to your LAN with at least two open Ethernet ports
- Flash drive to boot installers off of and/or an official Mac OS X Lion CD
The first step in this process is to install the latest version of macOS with the OpenCore Legacy Patcher (if you haven't done so already). This guide will not walk you through how to do that; however, you can follow the official guide here or follow one of the many tutorials on YouTube.
Installing Mac OS X Lion
With the latest version of macOS ready to go, we need to install Mac OS X Lion. Wait a minute, I hear you saying, what does installing Lion have anything to do with this? We are trying to get LOM support on the latest version of macOS. Correct. However, the newer versions of macOS don't have the ability to configure the LOM port on the Xserve, so we have to resort to an older version for this step. For this step, you can either use a separate drive, or partition your current drive with the latest version of macOS with OpenCore Legacy Patcher, if you prefer. Just make sure, if you choose the latter, that you partition the drive in your modern macOS install before you boot into your Mac OS X Lion installer. In either case, you can easily switch between the two installs if you ever need to change your LOM network settings; because, again, new versions of macOS don't allow you to do this. This way, if you have two drives or Mac OS X Lion as a dual boot, it prevents you from having to nuke your macOS install every time you need to make a change. All you have to do is swap drives, or boot into your other partition. Since we have to do this step using Mac OS X Lion, if you have a 1,1 Xserve, you can also use this portion of the guide to configure your LOM. You just can't go on to any newer version of macOS due to its 32-bit CPU limitation.
First, you will need a copy of Mac OS X Lion. If you don't have a CD of the installer, or the installer already downloaded, you can download a copy of the installer from Apple here. If you downloaded the installer, you have to make it bootable. Open the InstallMacOSX.dmg file you just downloaded and double click the InstallMacOSX.pkg installer. This will it should give you a Install Mac OS X Lion.app file. in your applications folder, which you will need to make a bootable installer. If you are unfamiliar with how to make a bootable macOS installer, you can find a guide specifically for Mac OS X Lion here.
Once you have your bootable Mac OS X Lion installer, it is time to begin. First, insert the bootable installer and then fire up your Xserve and listen to the fans roar. Once your installer finally boots up, make sure to format your drive/partition as 'MacOS Extended Journaled' (if you haven't done so already) and install Mac OS X Lion on it.
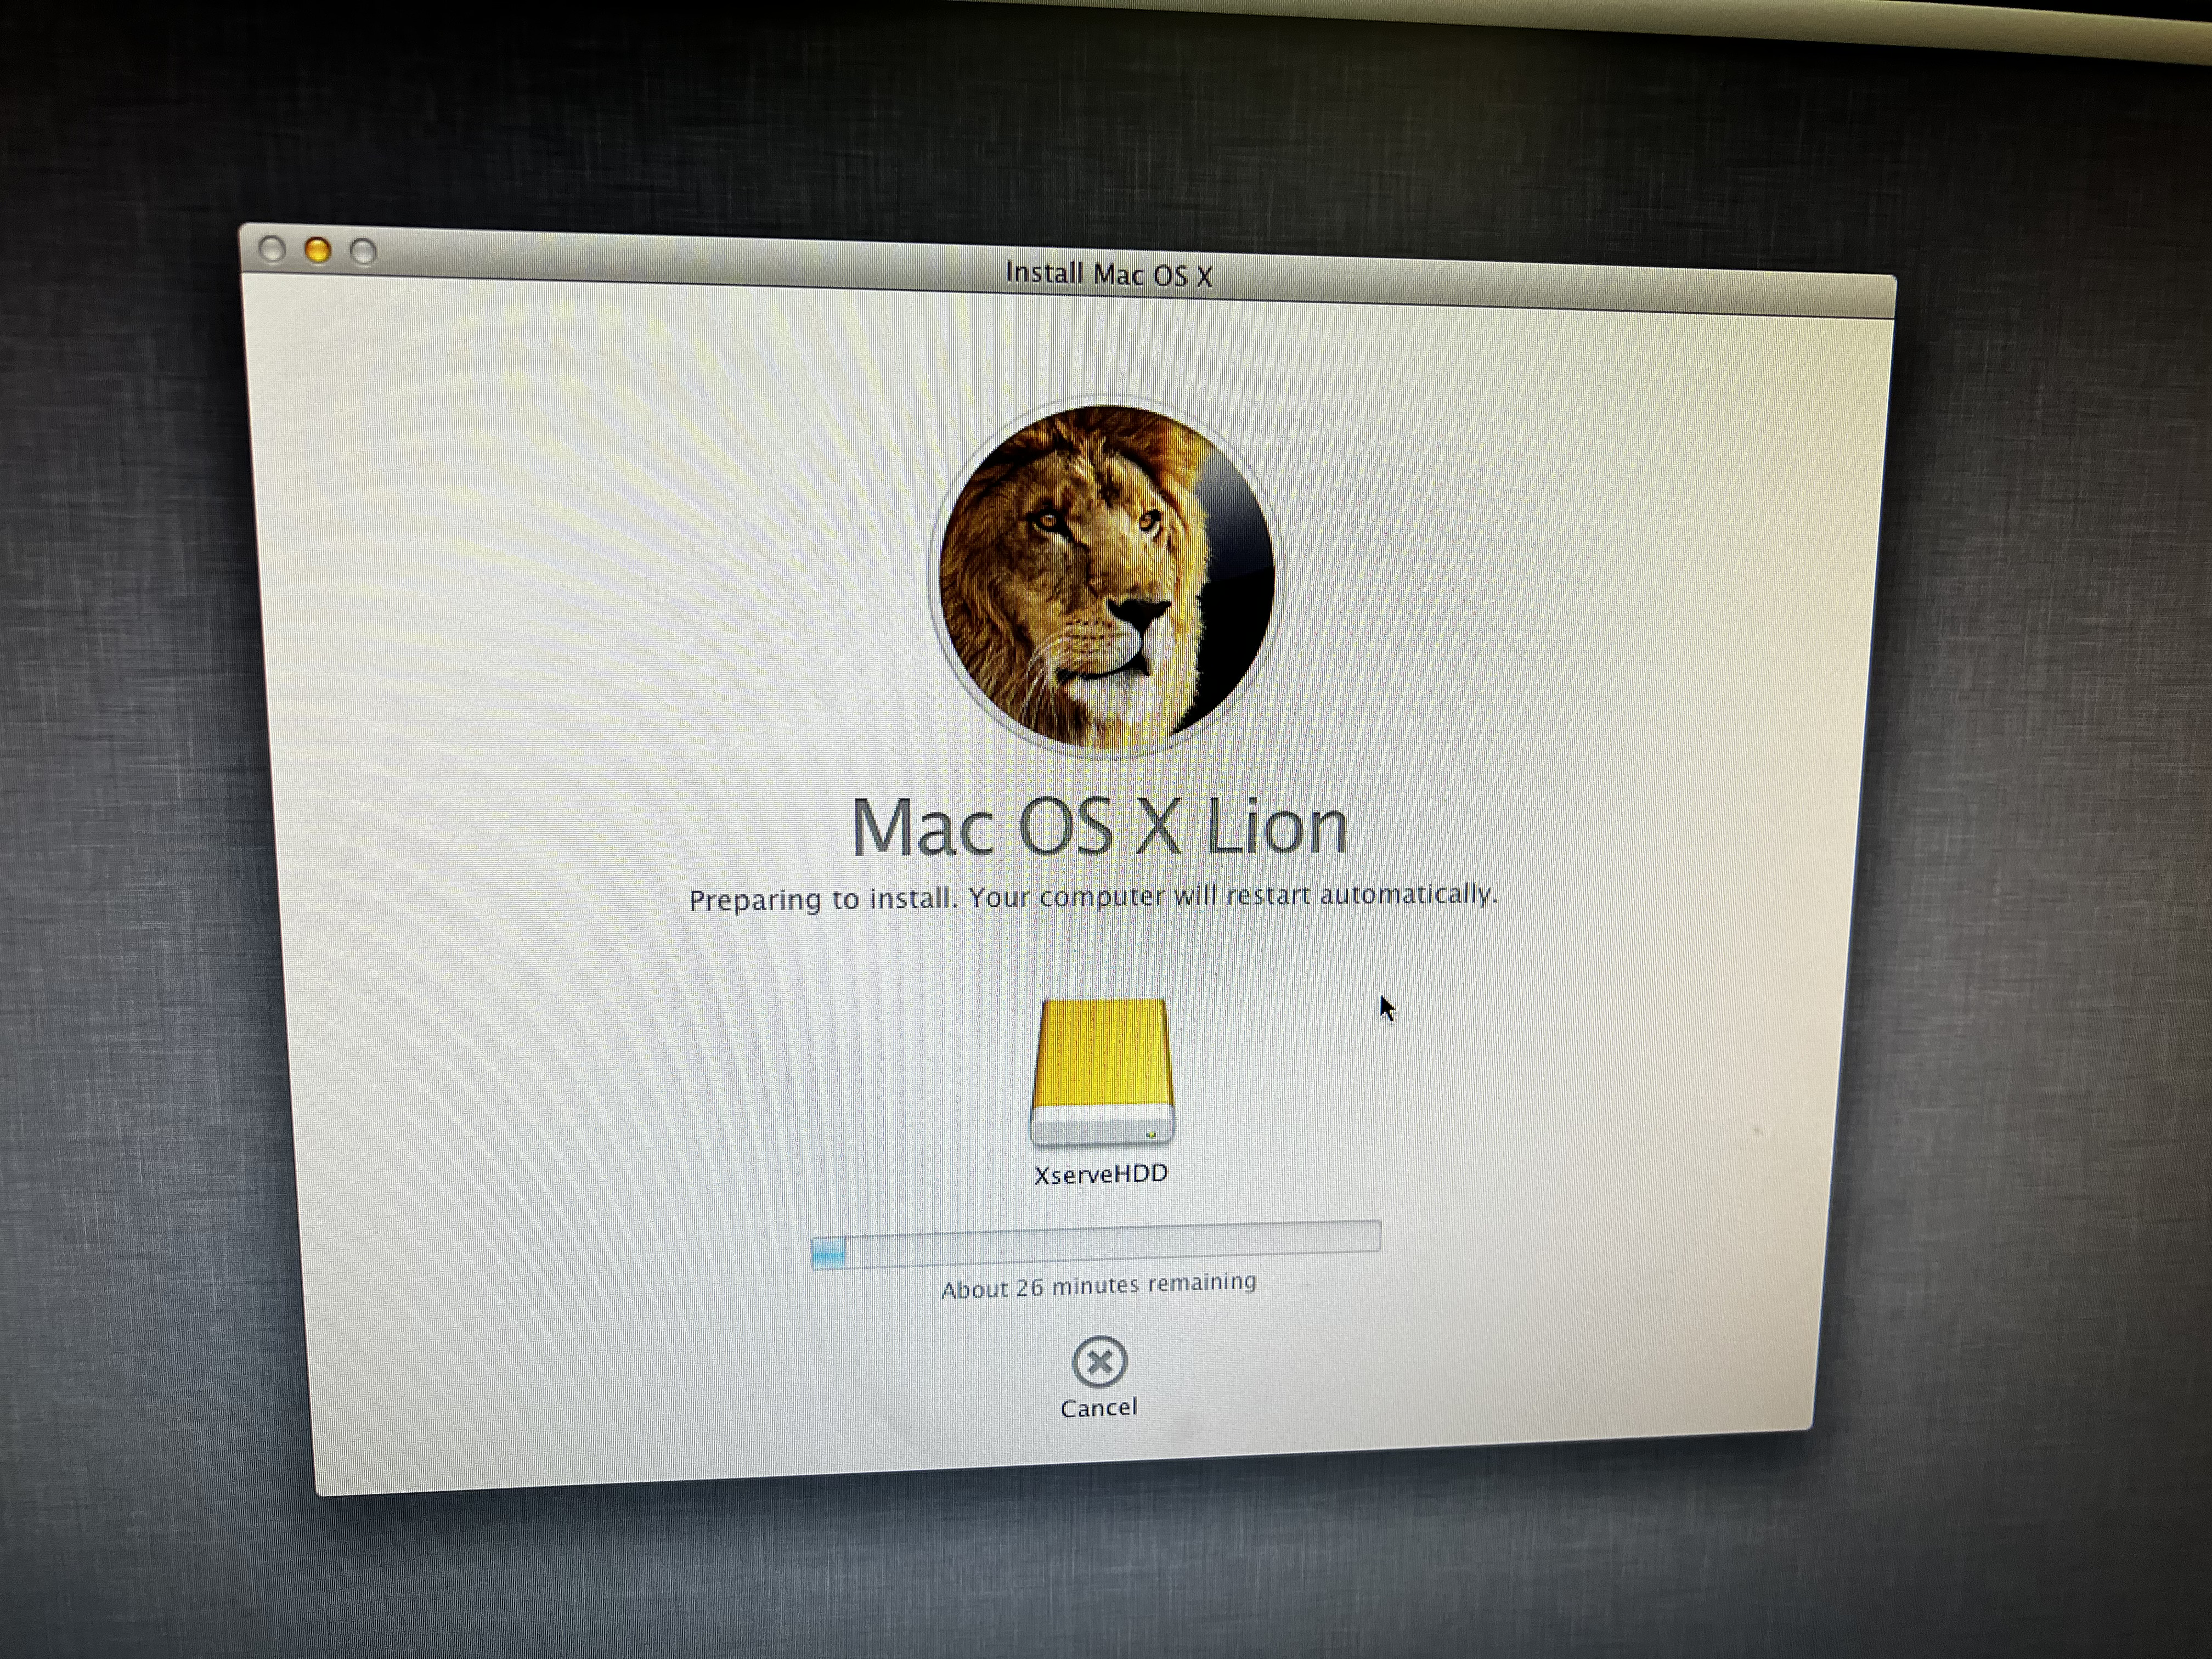
Figure 1. Mac OS X Lion install to drive
This installation process will take a while, so go for a walk or something. That way, you can get away from the deafening sound of those fans for a little while.
Once Mac OS X is installed, go through the set-up process like usual.

Figure 2. Mac OS X Lion post-install setup screen
Congratulations, the first step is complete. Make sure that your version says Mac OS X Lion 10.7.5. If it says something else, like Mac OS X Lion 10.7.3, go to system settings, software update, and install updates. This should get you updated to 10.7.5. With Lion installed, we can move on to configuring the LOM.
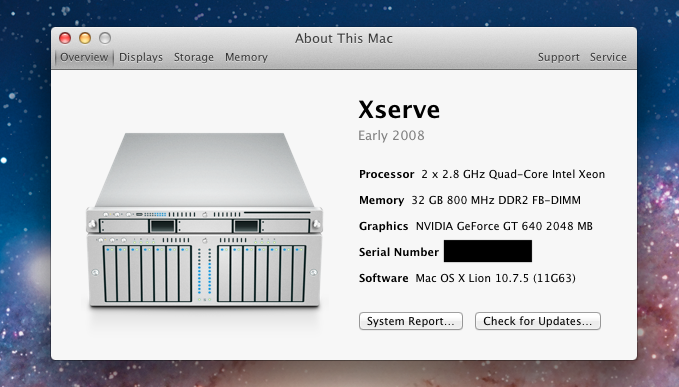
Figure 3. Mac OS X Lion sucessfully installed and ready to go
Install Server Admin Tools
The next step is pretty simple. All we have to do is install server admin tools for 10.7.5. You can download the installer from Apple here. Once downloaded, open the .dmg and double click on the ServerAdminTools.pkg file to go through the installation process.

Figure 4. Server Admin Tools installer
After that, you should see that the installation was successful and you are ready to configure your LOM.

Figure 4. Server Admin Tools install success
Configuring the Lights-Out Management Port
With all the setup out of the way, we can finally configure the LOM. To start, open up your terminal and enter the following commands:
sudo ipmitool lan set 1 ipaddr [IP Address]
sudo ipmitool lan set 1 netmask [Netmask]
sudo ipmitool lan set 1 defgw ipaddr [Default Gateway]
sudo ipmitool lan set 1 access on
sudo ipmitool lan set 1 arp respond on
sudo ipmitool user set name 2 admin
sudo ipmitool user set password 2
sudo ipmitool user enable 2
sudo ipmitool user priv 2 4 1
sudo ipmitool lan set 1 auth ADMIN PASSWORD
Obviously, make sure to change the IP address, Netmask, and Default Gateway to your appropriate settings, like this example here.
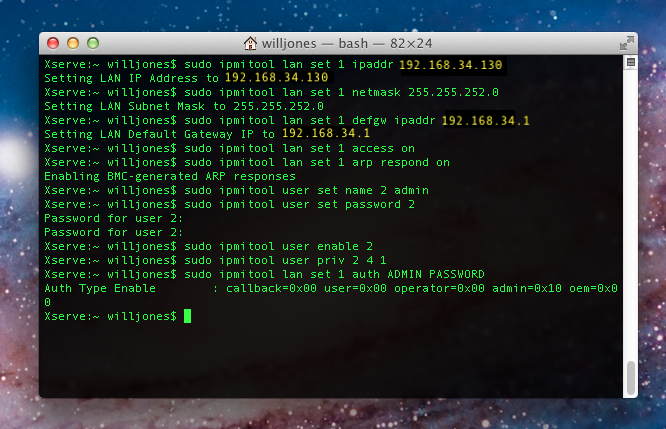
Figure 5. Commands setting up the LOM
What do these commands mean? The first 5 are configuring your channel 1 (Ethernet 1 or eth0 port) to be configured as the LOM port. It's important to note that once you set this up, in your system preferences, under network, Ethernet 1, where it says "Configure IPv4", make sure that is set to off. Both on this install and on your modern macOS install. This way, you don't run the risk of conflicts on the port. It also goes without saying that your second Ethernet port shouldn't be set to the same IP as your LOM port. Since we are using one of the Ethernet ports for LOM, this is why you need two cables; so, once you turn off the Ethernet 1 port, you can still have internet for the Xserve.
The final commands deal with the user account to access the LOM remotely. You can set the name to be whatever you want, but I chose admin. When you enter the command for setting the password, it will prompt you for the password twice. The next two commands deal with enabling the user we just created, giving them adequate permissions, and allowing them to access Channel 1, which is the LOM port we just set up. The last command is one of the most important, which had me scratching my head for a while. This command is what allows you to remotely access the LOM from another device, aka. The whole point of this. What we are saying here is allow the ADMIN account type, which we just set our newly created user to be, to be authenticated by their password for channel 1. Without this, you'll just get errors when trying to connect to your LOM from another device.
Once you've entered those commands, you should be good to go. On another machine that has ipmitool, you can test it with the following command:
sudo ipmitool -H [LOM IP] -U [LOM User] -a power status
This command will first prompt you for your LOM user's password, then if everything works, it will display the current power status of your Xserve as seen here.
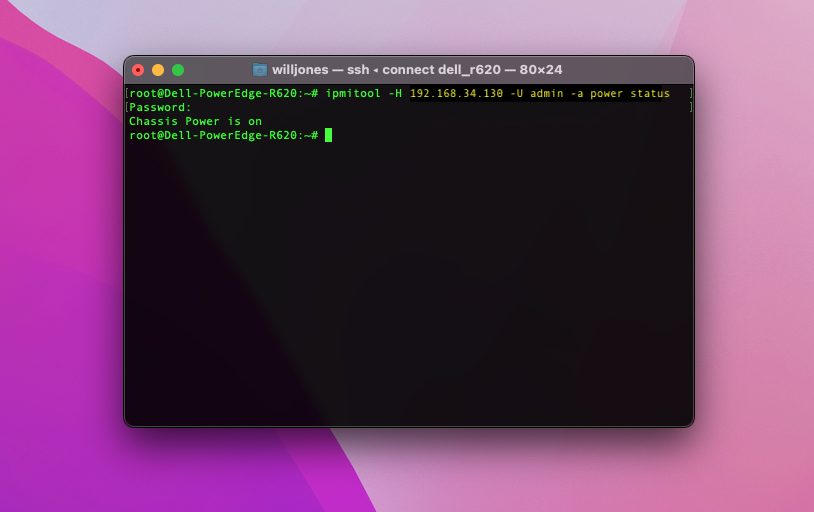
Figure 5. Successfully connecting to the LOM after configuration
If you get an error, this could be for one of two reasons. The first is that you entered something in wrong, or two, you need to reset the LOM. To reset the LOM, shut down the Xserve and completely unplug it from power for at least 30 seconds before plugging it back in and turning it on.
Once you verify that the LOM is working, and configured properly, you're all set and ready to go back to your modern version of macOS with a working LOM!
Using LOM in modern day macOS
After you're satisfied with your LOM configuration, restart your Xserve and boot back into your modern macOS install. If you installed Mac OS X Lion on a separate drive, shut down your Xserve and replace your Mac OS X Lion drive with one that contains your modern version of macOS and OpenCore, in my case macOS Monterey, and boot your Xserve.
To be doubly sure everything worked, run the same command you did to test the LOM after you booted back into your modern macOS version. In my case, I'm running 12.6. Which is the latest version of macOS, as of writing.
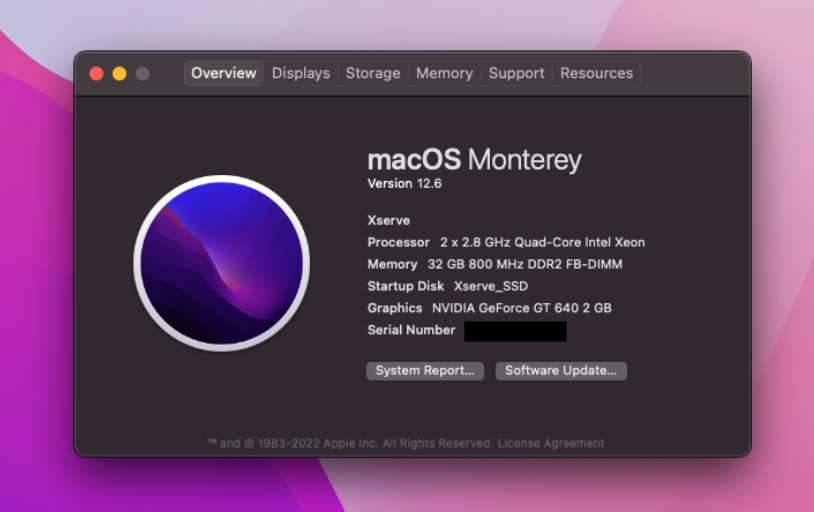
Figure 6. My Xserve post LOM config booted into macOS Monterey
And as you can see, everything is still working!
Figure 7. LOM access still working after switching back to Monterey
Once you verify that everything is working, you now have a fully operational LOM port on your Apple Xserve in a modern version of macOS! One thing to note, though, if you are on your Xserve,
the only LOM access you will have, will be like you were on a remote machine. Meaning, you can only access the LOM by entering the LOM IP and credentials when using ipmitool.
Which, by the way, you have to download with brew install ipmitool. If you try one of the other commands without the IP and credentials, such as
sudo ipmitool lan print 1 you'll get "No hostname specified!".
Wrapping things up
Now you have the ability to remotely start, stop, and pull metrics from your Xserve, all while having the piece of mind knowing you're on the latest version of macOS and are more protected from cyber-attacks. If, for whatever reason, you need to update your LOM settings, all you have to do is reboot into your Mac OS X Lion partition, or shut down your system, swap the drive with your Mac OS X Lion drive, and run the ipmitool commands accordingly for your desired new settings. Then, reboot back into your modern macOS install or swap back to your drive with your modern macOS install, depending on how you configured it.
Since you can now remotely start and stop your Xserve remotely, now you have the added benefit of never having to be in the same room as the darn thing and hear its fans!
Now enjoy having the ability to use your Xserve's LOM while also enjoying modern macOS
Updates
1/9/2023: LOM access tested and working on macOS Monterey 12.6.2
1/28/2023: LOM access tested and working on macOS Ventura 13.2
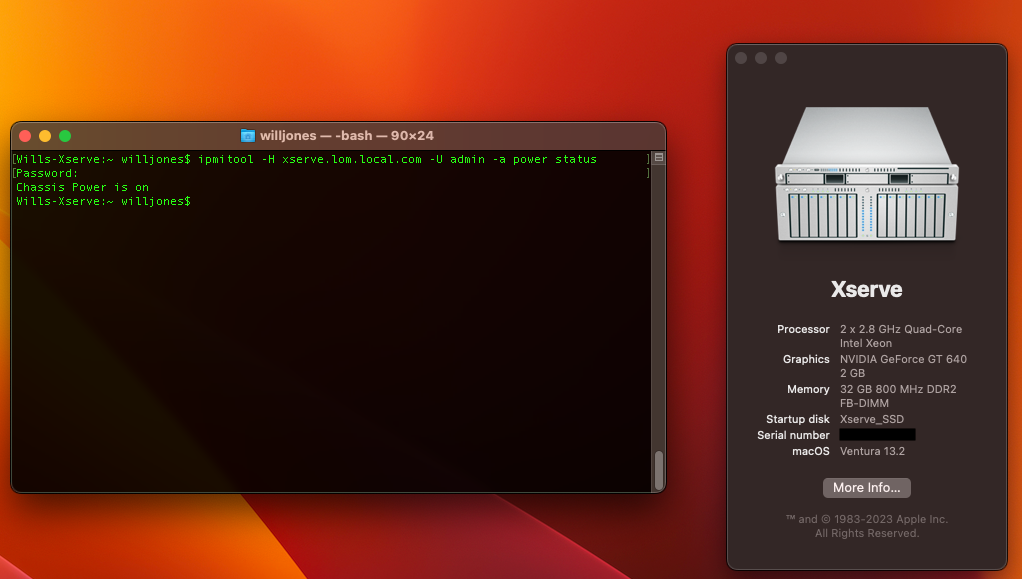
Figure 8. Xserve LOM access still working on macOS Ventura 13.2
10/25/2023: LOM access tested and working on macOS Sonoma 14.1
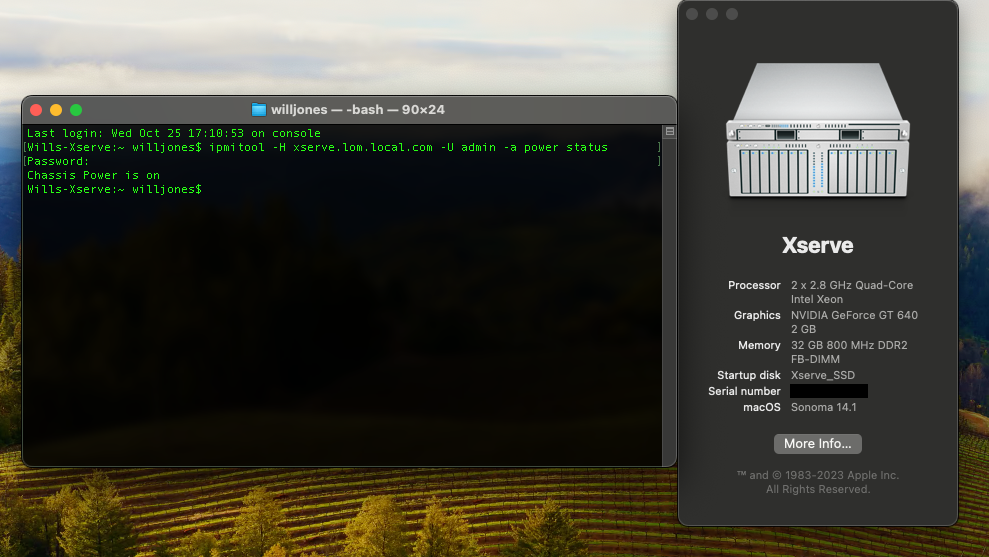
Figure 9. Xserve LOM access still working on macOS Sonoma 14.1